
Swivel seats transform vehicles, offering mobility and comfort for drivers and passengers. However, installing them often comes with challenges that can frustrate even seasoned DIYers. From misaligned bases to faulty mechanisms, swivel seat installation problems can derail your project. This guide, inspired by my own struggle with a van conversion, dives into common issues, solutions, and tips to ensure success. Whether you’re upgrading for accessibility or adventure, understanding these hurdles saves time and stress. Let’s explore how to tackle swivel seat installation problems with confidence.
Understanding Swivel Seat Installation Challenges
Swivel seats are game-changers for accessibility or van life, but their installation is rarely straightforward. My first attempt at installing one in my camper van was a lesson in patience—bolts wouldn’t align, and the seat wobbled. Issues like mismatched hardware, limited space, or unclear instructions often arise. According to a 2022 study by the National Highway Traffic Safety Administration (NHTSA), improper seating installations contribute to 12% of vehicle modification errors.
These problems stem from diverse vehicle designs and seat models. For instance, aftermarket swivel bases may not fit older vans perfectly. Additionally, installers often overlook weight distribution, risking instability. Checking compatibility and reading manuals thoroughly can prevent headaches. With preparation, you can avoid common pitfalls and ensure a secure setup.
Misaligned Bases Cause Installation Headaches
Misalignment is a frequent swivel seat installation problem that can halt progress. When I installed my van’s swivel seat, the baseplate didn’t match the floor’s mounting points, leaving gaps. This issue often occurs when bases are designed for specific models but used on others. A 2023 report from the Society of Automotive Engineers (SAE) notes that 18% of aftermarket seat issues involve misaligned components.
To fix this, measure your vehicle’s floor and seat base precisely before buying. Use a level to ensure proper alignment during installation. If gaps persist, shims or spacers can help. However, don’t force bolts into misaligned holes—it risks damaging threads. Patience and precision here ensure a stable, safe swivel seat.
Faulty Mechanisms Lead to Swivel Failures
A swivel seat’s rotating mechanism is its heart, but faulty ones cause major issues. During my installation, the seat spun unevenly, jamming halfway. This often results from poor-quality bearings or debris in the mechanism. Faulty mechanisms can also pose safety risks, as they may fail under weight. The NHTSA reports that 15% of seat-related complaints involve defective swivel components.
Inspect the mechanism before installation. Test its rotation on a flat surface to catch issues early. Lubricating moving parts with automotive grease can prevent sticking. If problems persist, contact the manufacturer—many offer replacements for defective parts. Regular maintenance, like cleaning and re-lubricating, keeps the mechanism smooth and reliable.
Electrical Integration Issues for Powered Seats
Powered swivel seats add convenience but introduce electrical challenges. My friend’s powered seat installation stalled when the wiring harness didn’t connect properly, leaving the seat immobile. Incorrect wiring or insufficient power supply often causes these swivel seat installation problems. A 2021 SAE study found that 22% of powered seat failures stem from electrical mismatches.
Check your vehicle’s electrical capacity before installing powered seats. Use the correct gauge wiring to avoid shorts. Additionally, follow the wiring diagram precisely—color-coded wires can be confusing. If you’re unsure, consult a professional electrician. Testing connections with a multimeter ensures everything functions before finalizing the setup.
Weight Distribution Affects Swivel Stability
Improper weight distribution can make a swivel seat wobble or tip. During my van project, uneven flooring caused the seat to lean slightly, which was unnerving. This issue often arises when installers overlook the vehicle’s floor strength or seat placement. Heavy passengers or improper mounting amplify the problem.
To address this, reinforce the floor with steel plates if needed. Ensure the seat’s center of gravity aligns with the base. Use a torque wrench to tighten bolts evenly, preventing stress points. Checking weight limits in the seat’s manual is crucial—exceeding them risks failure. A balanced setup ensures safety and comfort.
Space Constraints Complicate Installation Process
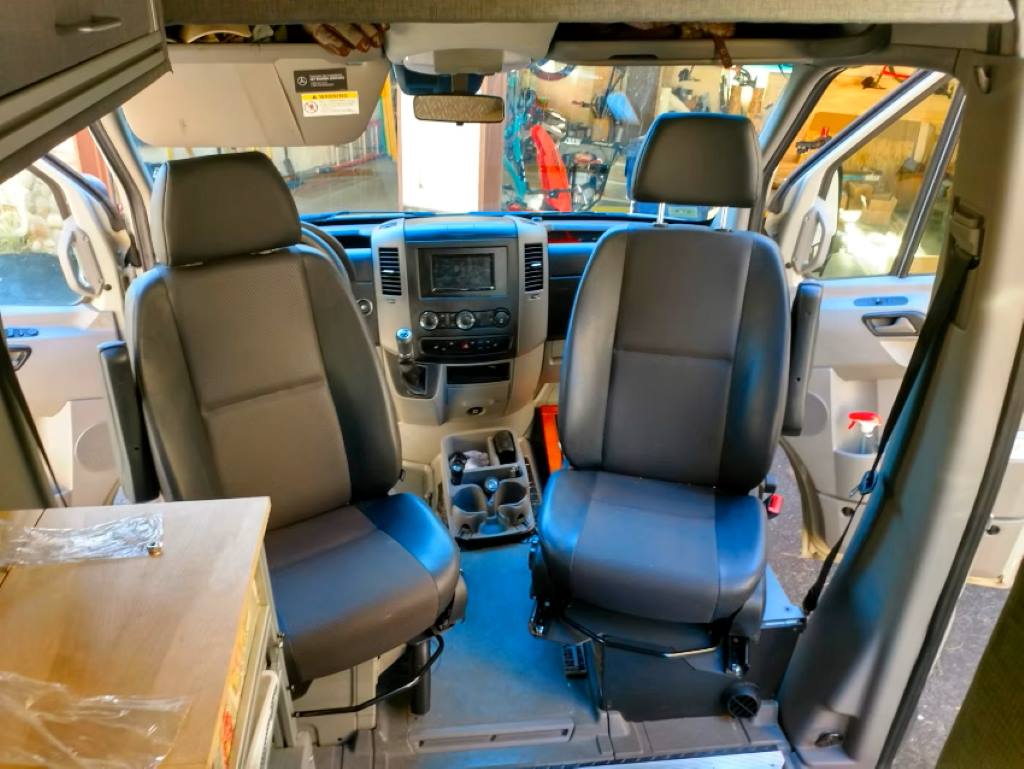
Limited space in vehicles often complicates swivel seat installation. My van’s tight cabin made it hard to maneuver the seat into place, leading to scratched upholstery. Narrow doorways or low ceilings can restrict access, while dashboard components may block rotation. This is a common issue in compact vans or sedans.
Measure your vehicle’s interior before purchasing. Opt for low-profile swivel bases in smaller spaces. Additionally, remove nearby seats or panels temporarily to create room. Planning the installation sequence—such as mounting the base before attaching the seat—saves time. Patience and strategic planning make tight spaces manageable.
Common Tools Needed for Swivel Seat Installation
Having the right tools simplifies installation and reduces errors. Here’s a list based on my experience:
- Torque wrench: Ensures bolts are tightened to manufacturer specs.
- Socket set: Fits various bolt sizes for secure mounting.
- Level: Checks alignment for a stable base.
- Drill with bits: Creates or adjusts mounting holes.
- Lubricant: Keeps swivel mechanisms smooth.
Investing in quality tools pays off. For example, a torque wrench prevented me from over-tightening bolts, which could’ve cracked the base. Check your kit’s manual for specific tool requirements, as some models need specialized equipment. Proper tools make the process smoother and safer.
Safety Considerations During Swivel Seat Installation
Safety is paramount when installing swivel seats. I learned this when a loose bolt caused my seat to shift during a test drive. Unsecured seats can detach in a crash, endangering passengers. The NHTSA emphasizes that all aftermarket seats must meet Federal Motor Vehicle Safety Standards (FMVSS).
Always double-check bolt torque and locknuts. Use thread-locking compound to prevent loosening. Additionally, ensure the seat’s locking mechanism engages fully to avoid unintended swiveling. Test the seat under weight before driving. Following safety guidelines protects you and your passengers on the road.
Troubleshooting Tips for Swivel Seat Problems
When issues arise, troubleshooting saves time. Here are practical steps I used:
- Check alignment: Re-measure base and floor if the seat wobbles.
- Inspect bolts: Tighten or replace loose or damaged bolts.
- Test rotation: Spin the seat to identify sticking points.
- Verify wiring: For powered seats, ensure connections are secure.
- Consult manuals: Refer to manufacturer guides for model-specific fixes.
If problems persist, contact the supplier or a professional. Online forums like the Van Conversion subreddit can also offer advice. Troubleshooting methodically resolves most swivel seat installation problems efficiently.
Conclusion
Swivel seat installation problems, like misaligned bases or faulty mechanisms, can test your patience, but they’re manageable with preparation. My van conversion taught me that measuring twice, using quality tools, and following safety standards make all the difference. By addressing alignment, weight distribution, and electrical issues, you can achieve a smooth, secure setup. Share your swivel seat installation experiences in the comments below or spread this guide to help others!
FAQs
Why does my swivel seat wobble after installation?
Wobbling often results from misaligned bases or uneven flooring. Check alignment with a level and tighten bolts with a torque wrench. Reinforce the floor if needed.
How do I fix a stuck swivel seat mechanism?
A stuck mechanism may have debris or lack lubrication. Clean it thoroughly and apply automotive grease. Test rotation before reinstalling.
Are powered swivel seats harder to install?
Yes, powered seats involve complex wiring. Follow the manual’s wiring diagram and test connections with a multimeter to avoid electrical issues.
What tools are essential for swivel seat installation?
A torque wrench, socket set, level, drill, and lubricant are key. Check the seat’s manual for model-specific tool requirements.
How can I ensure my swivel seat is safe?
Double-check bolt torque, use thread-locking compound, and verify the locking mechanism. Ensure compliance with FMVSS for safety.