
Learning how to add solar panels to a campervan gives you greater freedom while traveling across the USA. Solar energy helps power essential devices without depending on campground hookups every day. According to the U.S. Department of Energy, solar technology continues expanding because of improving efficiency and falling equipment costs. Meanwhile, the RV Industry Association reports that self contained camping remains increasingly popular, making reliable off grid power more valuable than ever.
Why Add Solar Panels to Your Campervan?
Solar panels provide dependable electricity while reducing generator use and fuel expenses. Additionally, they allow longer stays in remote destinations without sacrificing everyday comfort. If you also travel during colder months, understanding vehicles freeze faster overnight conditions helps you prepare your electrical system for changing weather.
A properly designed solar setup keeps lights, refrigerators, fans, and charging stations running smoothly. Therefore, you enjoy greater flexibility whether camping in national parks or exploring scenic highways across the USA.
Understand How a Campervan Solar System Works
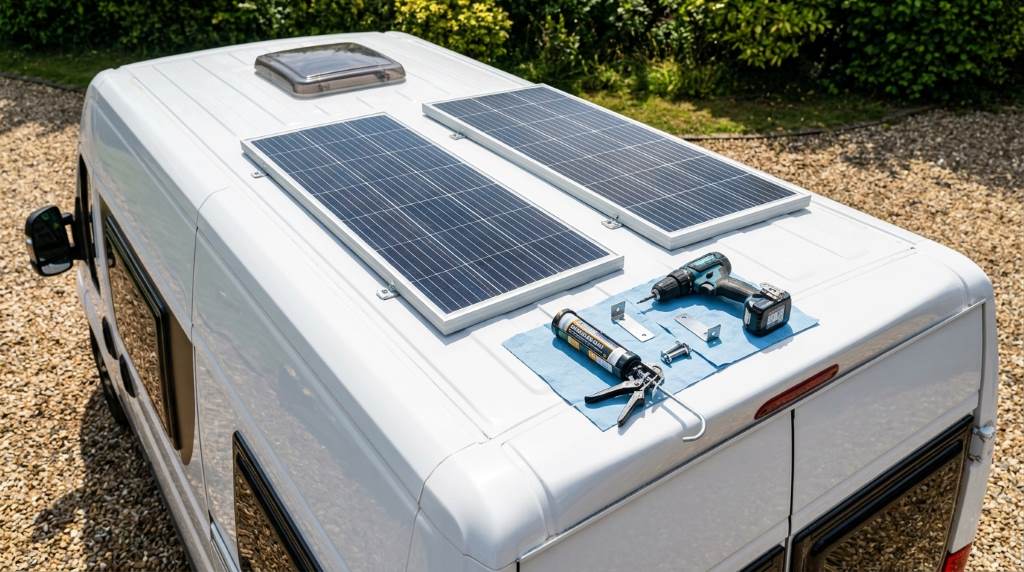
Before purchasing equipment, understand how every component works together. Each part supports reliable power production and storage throughout your journey.
Main Components
- Solar panels
- Charge controller
- Deep cycle battery or lithium battery
- Power inverter
- Battery monitor
- Fuses and circuit breakers
- Solar cables and connectors
- Mounting brackets
Sunlight reaches the panels before producing direct current electricity. Next, the charge controller safely regulates battery charging while protecting the electrical system.
Finally, the inverter converts stored power into household alternating current whenever necessary. However, many campervan appliances already operate directly from twelve volt batteries.
Choose the Right Solar Panels
Selecting suitable solar panels depends on available roof space and your daily energy needs. Furthermore, quality panels usually deliver stronger long term performance and better durability. If rooftop accessories matter, review how to find 110 v rooftop camper van ac heat units before finalizing your roof layout.
Monocrystalline Panels
Monocrystalline panels produce excellent efficiency while requiring less roof space. Consequently, they remain the preferred choice for most campervan owners.
Polycrystalline Panels
Polycrystalline panels generally cost less than premium alternatives. However, they usually require additional installation space for similar electrical output.
Flexible Panels
Flexible panels weigh less and fit curved roofs more easily. Still, rigid panels often provide longer service life and improved cooling.
Calculate Your Daily Power Consumption
Knowing daily energy usage prevents expensive purchasing mistakes and disappointing performance. Moreover, accurate calculations simplify battery and panel selection. Before larger upgrades, explore build camper van planning ideas to create an efficient electrical layout.
List every electrical device you expect to use during travel. Then multiply wattage by daily operating hours for each appliance.
Afterward, combine every total to estimate your daily energy requirement. Finally, add extra capacity because weather conditions regularly affect solar production.
Example Daily Usage
- LED lights: 40 Wh
- Portable refrigerator: 500 Wh
- Laptop: 120 Wh
- Phone charging: 30 Wh
- Roof fan: 180 Wh
This example totals approximately 870 watt hours every day. Therefore, your battery bank and solar array should comfortably exceed this demand.
Select the Best Battery Type
The battery stores electricity collected throughout sunny hours for later use. Consequently, choosing the right battery greatly influences overall system performance.
Lithium Batteries
Lithium batteries charge quickly while offering deeper discharge capability and longer lifespan. Although they cost more initially, they often provide better long term value.
AGM Batteries
AGM batteries remain affordable and require little maintenance during ownership. Nevertheless, they weigh more and offer lower usable capacity than lithium models.
Pick the Correct Charge Controller
The charge controller protects batteries from overcharging and unstable voltage. Besides improving safety, it maximizes charging efficiency throughout changing weather conditions.
PWM Controllers
PWM controllers suit smaller systems with modest electrical requirements. They remain economical for beginner campervan owners with limited budgets.
MPPT Controllers
MPPT controllers extract more energy from solar panels during varying sunlight conditions. Accordingly, they perform especially well for larger solar installations.
Plan the Roof Layout Carefully
Roof planning improves airflow while preventing shading from nearby accessories. Additionally, organized placement simplifies future maintenance and equipment upgrades.
Avoid positioning panels beside roof vents that cast regular shadows. Instead, leave enough clearance for cleaning and secure cable routing.
Install the Solar Panels Safely
Always verify roof strength before drilling mounting holes into the campervan. Furthermore, use manufacturer approved brackets and waterproof sealant for lasting protection.
Secure every panel firmly before connecting electrical cables. After installation, inspect every fastener because highway vibration gradually loosens hardware.
Wire the Electrical System Correctly
Proper wiring protects equipment while reducing electrical resistance throughout the system. Therefore, use correctly sized cables and quality waterproof connectors.
Install inline fuses close to every battery connection for improved safety. Likewise, label each circuit because future troubleshooting becomes much easier.
Test the Entire Solar Setup
Testing confirms every component works together before your next adventure begins. Consequently, you avoid unexpected failures during remote camping trips.
Measure charging voltage under bright sunlight using a digital multimeter. Next, verify batteries charge normally while appliances operate without interruptions.
Maintenance Tips for Long Lasting Performance
Regular maintenance preserves efficiency while extending the lifespan of expensive solar equipment. Fortunately, most maintenance tasks require only a few minutes monthly.
- Clean panels with fresh water and a soft cloth.
- Inspect cable connections for corrosion.
- Check mounting hardware regularly.
- Monitor battery health every month.
- Remove leaves and debris from panel surfaces.
- Replace damaged wiring immediately.
Common Mistakes to Avoid
Many first time installers purchase equipment before calculating energy requirements. As a result, they often spend more while receiving disappointing performance.
Others ignore roof shading from vents or storage boxes during installation. Likewise, undersized wiring reduces efficiency and creates unnecessary heat.
Finally, skipping waterproof sealing increases the risk of costly roof leaks. Therefore, inspect every drilled opening before completing the installation.
Final Thoughts
Understanding how to add solar panels to a campervan creates dependable off grid power for unforgettable road trips throughout the USA. Careful planning, quality components, and proper installation deliver reliable performance for many years. Start designing your campervan solar system today, invest in trusted equipment, and enjoy greater travel freedom with confidence.
Frequently Asked Questions
How many solar panels does a campervan need?
Most campervans use between 200 and 400 watts depending on daily energy consumption.
Can I install campervan solar panels myself?
Yes, many owners complete the installation successfully with proper planning and safety precautions.
Are lithium batteries worth the extra cost?
Yes, lithium batteries generally provide longer lifespan, faster charging, and greater usable capacity.
Will solar panels charge batteries during cloudy weather?
Yes, solar panels still generate electricity although charging speed becomes noticeably lower.
How often should campervan solar panels be cleaned?
Clean the panels whenever dirt accumulates because clean surfaces maintain better charging efficiency.