
Winter can be tough on any vehicle. For an old RV, it can be especially damaging. Freezing temperatures cause water to expand inside pipes and tanks. This leads to costly cracks and leaks. However, with the right motorhome winterizing kit and a careful step-by-step process, you can protect your RV all season long. This guide walks you through everything you need to know to winterize an older motorhome safely and effectively.
Why Winterizing an Old RV Matters More
Older RVs are more vulnerable to winter damage than newer models. Their pipes may already be worn, and their seals might not be as tight. Therefore, skipping winterization on an aging motorhome is a bigger risk than most people realize.
Water left inside the plumbing system will freeze when temperatures drop below 32°F (0°C). When water freezes, it expands. This expansion puts pressure on pipes, fittings, and tanks. The result is often cracked pipes, burst water heaters, and damaged pumps. Repairing all of this can cost hundreds or even thousands of dollars.
Additionally, mold and moisture can build up inside the RV during cold months. This makes the interior unhealthy and unpleasant to use when spring arrives. Winterizing prevents all of these problems before they start.
What Is a Motorhome Winterizing Kit?
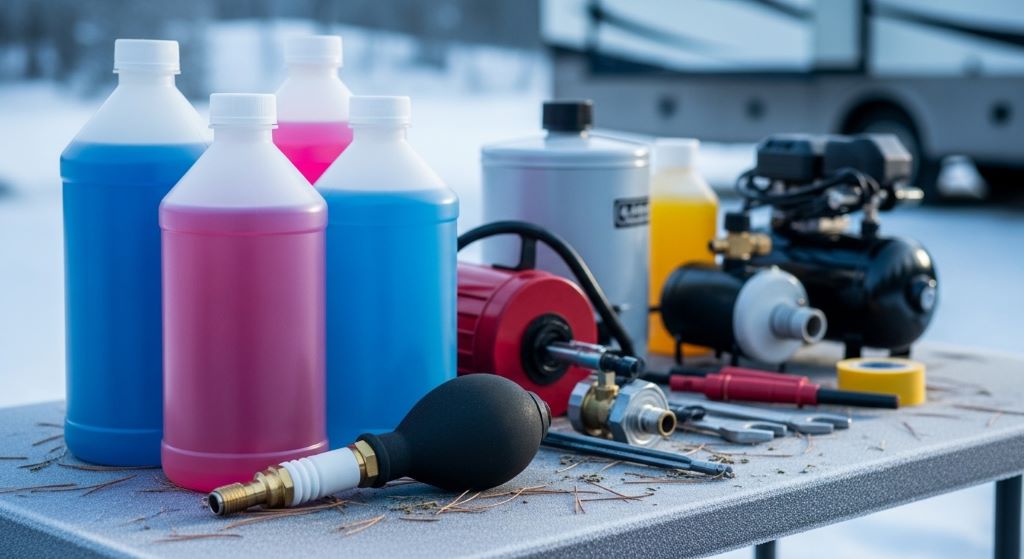
A motorhome winterizing kit is a collection of tools and supplies designed to help you prepare your RV for cold weather storage. Most kits include non-toxic RV antifreeze, a water pump converter kit, a blowout plug for compressed air, and basic fittings.
Some kits also come with a hand pump, bypass valves, and detailed instructions. They are widely available at RV supply stores and online retailers. Choosing the right kit for your RV’s size and plumbing layout is an important first step.
Non-toxic propylene glycol antifreeze is the most common choice for RVs. It is safe for drinking water systems once the RV is de-winterized in the spring. Always avoid using automotive antifreeze, as it contains harmful chemicals that can contaminate your water lines.
Gather Your Supplies Before You Start
Good preparation saves time and prevents mistakes. Before you begin, gather everything you need. Here is a list of basic supplies:
- Non-toxic RV antifreeze (typically 2 to 3 gallons for most older motorhomes)
- A water pump converter kit or bypass hose
- A compressor blowout plug (optional but helpful)
- A screwdriver and basic hand tools
- Rubber gloves
- A flashlight for checking hard-to-reach areas
Additionally, read through your RV’s owner manual if you still have it. Older models sometimes have unique plumbing layouts that require special attention.
Step-by-Step Guide to Winterizing Your Old RV
Step 1: Drain the Fresh Water Tank
Start by draining all the water from your fresh water tank. You can do this by opening the drain valve, which is usually located on the underside of the RV. Let all the water flow out completely.
After draining, turn on each faucet inside the RV briefly. This releases pressure and helps remove any remaining water from the lines. Do not forget the outdoor shower if your motorhome has one.
Step 2: Drain and Flush the Black and Gray Water Tanks
Next, drain your gray and black water tanks at a proper dump station. Flush the black tank with clean water using the built-in flush system if your RV has one. If not, use a tank rinser wand through the toilet.
These tanks should be as clean and empty as possible before storage. Leaving waste inside during winter can cause odor problems and encourage bacterial growth. Therefore, take the time to flush them thoroughly.
Step 3: Remove and Bypass the Water Filter
Your RV’s water filter should not be exposed to antifreeze. Locate the inline water filter, usually found near the fresh water inlet or under the sink. Remove it and set it aside.
After removing the filter, install a bypass valve or connect the lines directly so water can flow through the system without going through the filter housing. This protects the filter and ensures antifreeze flows freely throughout the plumbing.
Step 4: Drain the Water Heater
The water heater holds several gallons of water. You must drain it before winterizing. First, turn off the water heater and allow it to cool completely. Then, remove the drain plug or open the pressure relief valve to drain all the water.
On older RVs, water heater bypass valves may not already be installed. If that is the case, consider adding a bypass kit. This simple addition keeps antifreeze out of the water heater tank and saves you from using extra antifreeze to fill it. It is a worthwhile upgrade for any aging motorhome.
Step 5: Bypass the Water Heater
Once drained, use the bypass valves to isolate the water heater from the rest of the plumbing system. Most modern bypass kits have a two- or three-valve design. When the bypass is open, water flows around the heater instead of through it.
This step is critical. If you do not bypass the heater, antifreeze will fill the tank and you will need far more product than necessary. It also makes spring de-winterization much easier.
Step 6: Connect the Antifreeze Using the Water Pump Converter Kit
This is where your motorhome winterizing kit really comes in handy. A water pump converter kit includes a tube that connects to the inlet side of your RV’s water pump. The other end goes into a jug of non-toxic RV antifreeze.
Once connected, turn on the water pump. Then, go to each faucet, one at a time, starting with the one farthest from the pump. Open the hot water side first, then the cold side. Wait until you see pink antifreeze flowing from the faucet. Close it and move to the next one.
Repeat this process for every faucet, the shower, the outdoor shower, and any other water outlet in the RV. Do not forget the toilet. Flush it until antifreeze appears in the bowl.
Step 7: Treat the Drains and Toilet
Pour a small amount of antifreeze directly into each drain. This protects the P-traps, which are the curved sections of pipe under sinks and showers that hold water. If these freeze, they can crack.
Pour about a cup of antifreeze down each drain and into the toilet bowl. Additionally, pour a small amount into the gray and black tank inlets to protect the lower sections of those systems.
Step 8: Use Compressed Air as an Optional Extra Step
Some RV owners prefer to blow out the lines with compressed air before adding antifreeze. This removes most of the water first and reduces the amount of antifreeze needed. However, compressed air alone is not sufficient for full winterization.
If you choose to use this method, attach a blow-out plug to your city water inlet. Connect a compressor set to no more than 30 PSI. Open each faucet one at a time until air blows through. Then follow up with the antifreeze steps above.
Be careful with compressed air on older pipes. Too much pressure can damage weakened fittings or seals. Therefore, always use low pressure and proceed slowly.
Step 9: Protect the Exterior
Winterizing is not just about the plumbing. The exterior of your old RV also needs attention. Check all roof seams, vents, and window seals for cracks. Apply fresh sealant where needed to prevent water from entering the RV during winter storms.
Cover any exterior vents with mesh or vent covers to keep out insects and rodents. Also, check the tires. Old RV tires can develop cracks from cold temperatures and long periods of sitting. Consider using tire covers and moving the RV slightly every few weeks to prevent flat spots.
Step 10: Prepare the Interior for Storage
Close all window blinds or shades to reduce temperature swings inside the RV. Place moisture-absorbing products like desiccant packs in the bathroom, kitchen, and closets. These absorb humidity and reduce the risk of mold.
Remove all food, toiletries, and any items that can freeze or spoil. Leave cabinet doors slightly open to allow air circulation. Additionally, sprinkle baking soda in the refrigerator and leave the door ajar to prevent mildew and odors from forming over the winter months.
Common Mistakes to Avoid
Many RV owners, especially those with older motorhomes, make a few common errors during winterization. Knowing these mistakes in advance helps you avoid them.
One frequent mistake is forgetting the ice maker or dishwasher if the RV has one. These appliances have their own water lines that must also be purged and treated with antifreeze.
Another common error is using too little antifreeze. It is always better to use more than you think you need. Running out partway through the process leaves parts of the system unprotected.
Finally, some owners forget to check back on their RV during the winter months. An unexpected warm spell followed by a hard freeze can still cause damage if something was missed. Therefore, plan to do a quick check every few weeks throughout the season.
Conclusion
Winterizing an old RV with a motorhome winterizing kit is one of the most important things you can do to protect your investment. The process involves draining all tanks, bypassing the water heater, running antifreeze through every water line, and preparing both the interior and exterior for cold weather storage. Additionally, taking the extra time to seal the roof, protect the tires, and control interior moisture will keep your motorhome in better condition year after year. Follow these steps carefully, and your aging RV will be ready to hit the road again when spring arrives.
Frequently Asked Questions
1. How many gallons of RV antifreeze do I need to winterize an old motorhome?
Most older motorhomes require between 2 and 4 gallons of non-toxic RV antifreeze. The exact amount depends on the size and layout of the plumbing system. Larger rigs with more fixtures will need more product. It is always wise to buy an extra gallon just in case.
2. Can I use compressed air instead of antifreeze to winterize my RV?
Compressed air alone is not recommended as the only winterization method. While it removes most water from the lines, it cannot eliminate every drop. Small pockets of water can remain in low points in the plumbing and freeze. Using antifreeze after blowing out the lines gives you the best protection.
3. Do I need to winterize my RV if I live in a mild climate?
If temperatures in your area regularly drop below 32°F (0°C), you should winterize your RV. Even a single night of freezing temperatures can damage an unprotected water system. However, if you live somewhere that stays above freezing all winter, winterization may not be necessary.
4. How do I de-winterize my RV in the spring?
To de-winterize, remove all bypass valves and reinstall your water filter. Connect to a water source and flush each faucet until the water runs clear and the pink antifreeze color disappears. Reinstall the water heater drain plug, refill the water heater, and check all connections for leaks before use.
5. Is it safe to use RV antifreeze in my drinking water system?
Yes. RV antifreeze made from propylene glycol is non-toxic and approved for use in potable water systems. It is specifically designed for this purpose. However, always flush the system thoroughly in the spring before drinking or cooking with the water.
Related Topics:
Discovering the Joys of a Camper RV Shower: Your Guide to Refreshing Adventures
Master Your Mobile Hub: The Ultimate Guide to RV Garage Organization for Storage and Repairs